Namepy step 3 – Adding in Highcharts
(This is part of the namepy project. Start at Namepy – on the shoulders of giants)
Highcharts is a JavaScript library for creating high quality interactive charts. It is not open source but requires a license fee for commercial projects
- Grab Highcharts from http://www.highcharts.com/download
- Copy highcharts.src.js (for a production site use highcharts.js) into static/external
- Include this in helloworld.html:
<script src="static/external/highcharts.src.js"></script>
- Ditto for jQuery, download from https://jquery.com/download/, and include in helloworld.html, before the highcharts link
- Create a container for the chart:
<div id="container" style="min-width: 310px; height: 400px; margin: 0 auto;"></div>
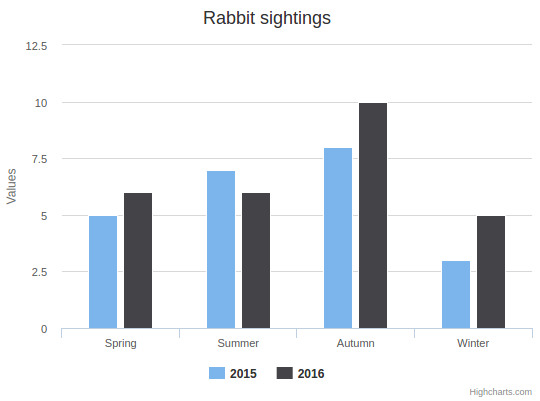
- Create a very simple chart, e.g.:
$(function () { $('#container').highcharts({ chart: { type: 'column' }, title: { text: 'Rabbit sightings' }, xAxis: { categories: [ 'Spring', 'Summer', 'Autumn', 'Winter' ], }, series: [{ name: '2015', data: [5, 7, 8, 3] }, { name: '2016', data: [6, 6, 10, 5] }] }); }); - Start the Flask/python script (python hello.py) and view the result in your browser (127.0.0.1:5000)

Done
- See the live version at http://cm-demo.com/namepy_step3/
- The source code is at https://github.com/CoachCoen/namepy/tree/step3
Next
Continue to Step 4 – PostgreSQL, SQLAlchemy and Flask-SQLAlchemy


